Installing a CKAN Catalogue and connecting to ODIS#

Background#
The following document explains how to set up a full metadata catalogue software architecture, with settings enabled to connect the catalogue to ODIS.
The initial steps are for CKAN, and specifically on Windows. You will have a choice to install CKAN through Docker, which is recommended, or to install CKAN (and its dependencies) manually, which is much more difficult.
Intended Audience#
The intended audience of these steps is for a technical person to follow, as the steps require familiarity with running commands at the commandline, and executing various scripts.
Windows Versions Supported#
The following steps were created on Windows Server 2022, but should work on Windows 11 or 10. You will be required to have full Administrator access on your server.
Option 1: Install CKAN through Docker (recommended)#
We will follow the Docker Compose steps for CKAN.
Install WSL#
To install Docker, we must install the WSL (Windows Subsystem for Linux), as follows:
follow https://learn.microsoft.com/en-us/windows/wsl/install
open CMD window and execute:
set the version of WSL to 2
wsl --set-default-version 2
see list of all Linux distribution names
wsl --list --online
now install Ubuntu
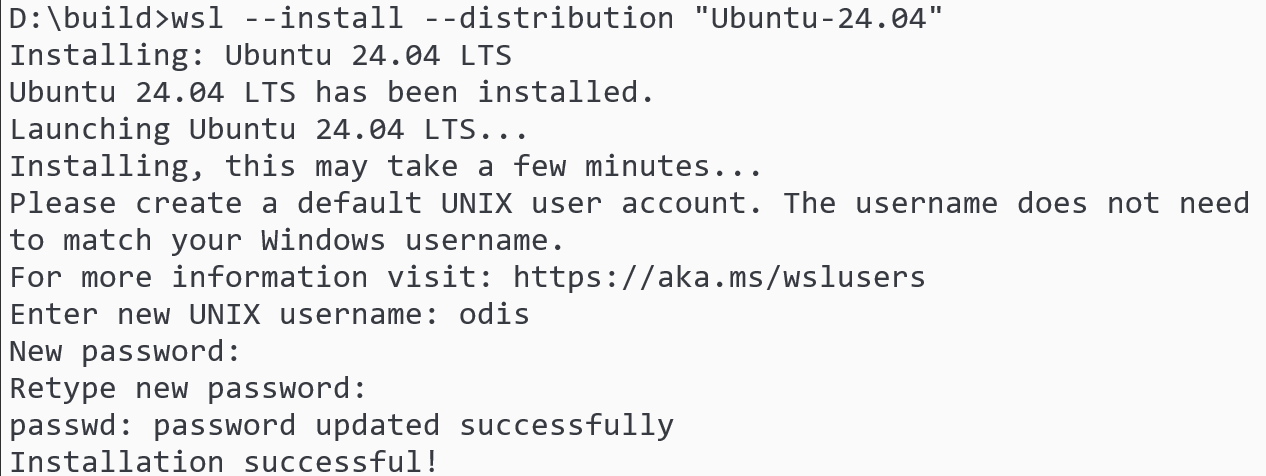
wsl --install --distribution "Ubuntu-24.04"
reboot machine
you should see a progress bar for installing Ubuntu
when asked to create a new user, enter:
  username: odis
  password: yourpassword
Caution
The WSL user has a lot of power (they have sudo/super-user permissions); it is strongly recommended that users change
yourpasswordto a secure and unique password for this account and keep hold of it in a password manager. That way if someone manages to hack CKAN and gain remote code execution capabilities, it won’t be so easy for them to gain super-user control.to run: goto Start menu, choose “WSL”
CMD window should open with an
odis@prompt
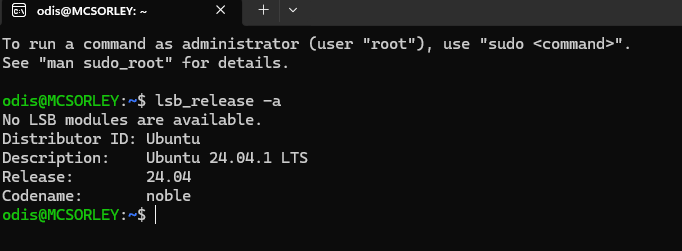
to check the Ubuntu version, execute:
lsb_release -a
which should return:
    Distributor ID: Ubuntu
    Description:    Ubuntu 24.04 LTS
    Release:        24.04
    Codename:       noble
Install Docker Engine#
We will follow the steps Install Docker Engine on Ubuntu.
assuming you are still at the
odis@prompt, but if not:goto Start menu, choose “WSL”
CMD window should open with an
odis@prompt
execute the following, to update your Ubuntu packages
sudo apt update
sudo apt upgrade
execute the following, to remove conflicking packages
for pkg in docker.io docker-doc docker-compose docker-compose-v2 podman-docker containerd runc; do sudo apt-get remove $pkg; done
execute the following, to setup Docker’s
aptrepository# Add Docker's official GPG key: sudo apt-get update sudo apt-get install ca-certificates curl sudo install -m 0755 -d /etc/apt/keyrings sudo curl -fsSL https://download.docker.com/linux/ubuntu/gpg -o /etc/apt/keyrings/docker.asc sudo chmod a+r /etc/apt/keyrings/docker.asc # Add the repository to Apt sources: echo \ "deb [arch=$(dpkg --print-architecture) signed-by=/etc/apt/keyrings/docker.asc] https://download.docker.com/linux/ubuntu \ $(. /etc/os-release && echo "$VERSION_CODENAME") stable" | \ sudo tee /etc/apt/sources.list.d/docker.list > /dev/null sudo apt-get update
now install the Docker packages by executing:
sudo apt-get install docker-ce docker-ce-cli containerd.io docker-buildx-plugin docker-compose-plugin
if successful, the response should contain the message
Hello from Docker!.
you can also try a
docker versioncommand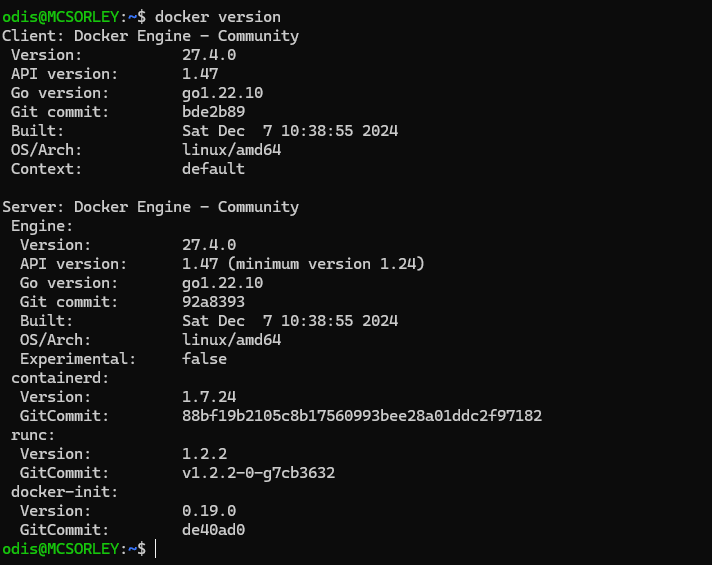
Clone the ckan-docker repository locally#
assuming you are still at the
odis@prompt, but if not:goto Start menu, choose “WSL”
CMD window should open with an
odis@prompt
execute the following, to clone the
ckan-dockerrepo locallygit clone https://github.com/ckan/ckan-docker.git ckan-docker-git-master

Install (build and run) CKAN plus dependencies#
execute
cd ckan-docker-git-mastermake a copy the the
.envfile for our needscp .env.example .env
you can optionally change the .env values for your needs, such as for the admin user/password
#use vi to open the .env file
vi .env
#to make your changes, first press your "i" key (for INSERT mode), and
  #then edit the desired lines
#then save with the command
:wq
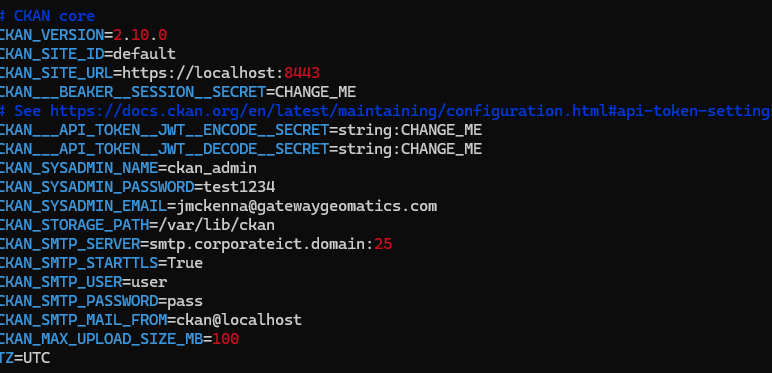
build the Docker images
docker compose -f docker-compose.yml build
you should see a response that states
Service ckan: Built
start the Docker containers
docker compose up -d
you should see a response that states that 6 containers are
Healthy
check status of containers by executing:
docker ps

Goto CKAN’s landing page#
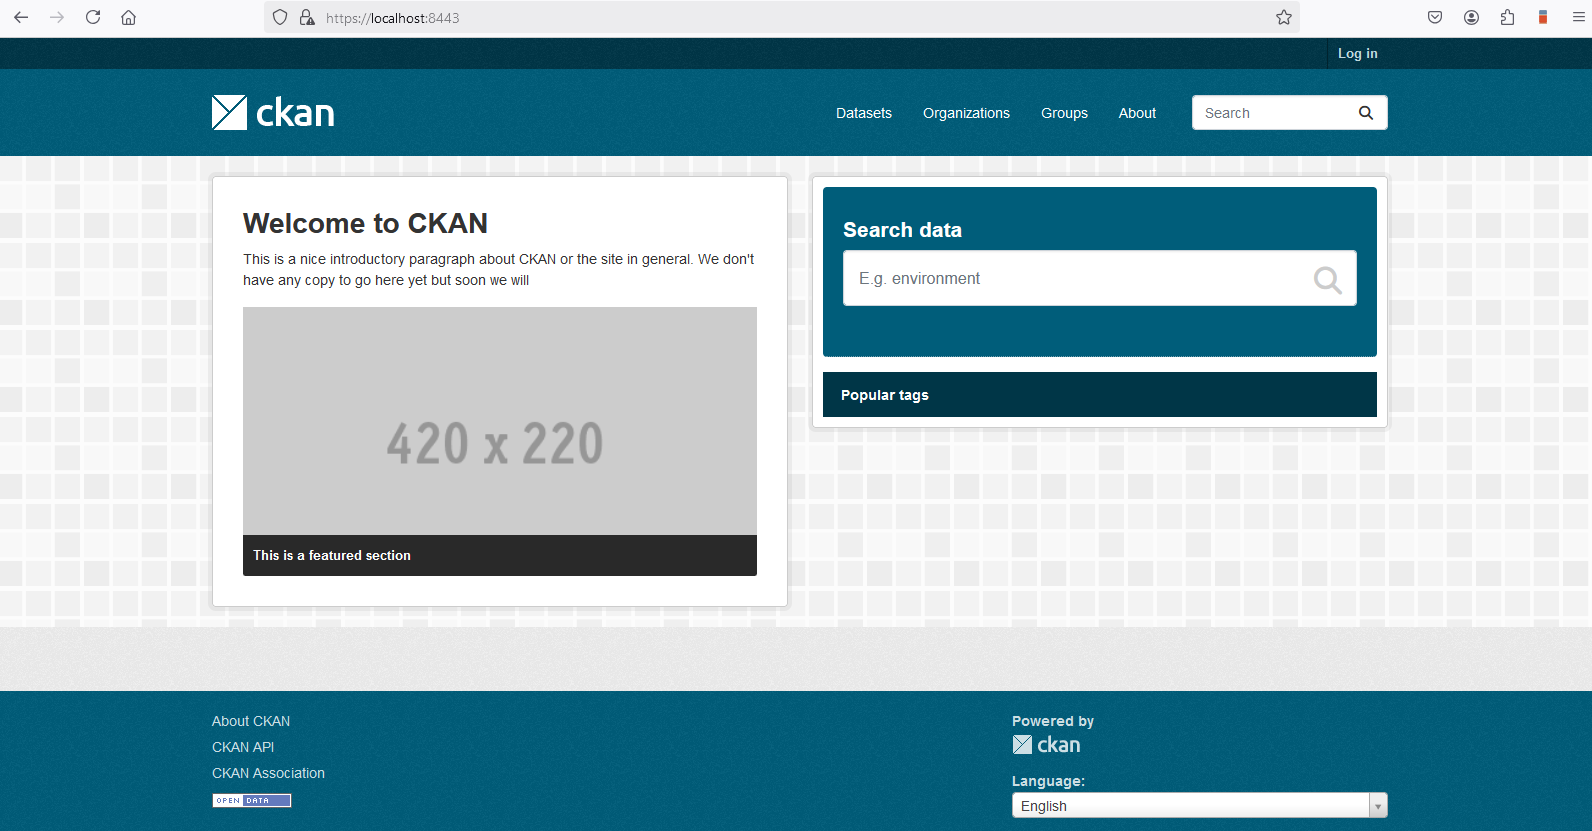
Now you are ready to open your CKAN instance in your web browser.
in FireFox or Chrome, goto: https://localhost:8443/
Install Portainer (Recommended) to manage containers#
Portainer offers a user-friendly interface to manage the CKAN containers. We will follow the Portainer installation steps for WSL.
Setup Portainer Server#
assuming you are still at the
odis@prompt, but if not:goto Start menu, choose “WSL”
CMD window should open with an
odis@prompt
execute the following, to create the volume that Portainer Server will use to store its database:
docker volume create portainer_data
then download and install the Portainer Server container:
docker run -d -p 8000:8000 -p 9443:9443 --name portainer --restart=always -v /var/run/docker.sock:/var/run/docker.sock -v portainer_data:/data portainer/portainer-ce:2.21.4
Check that the Portainer Server container has started by executing:
docker ps

You should see a
portainerline with theStatusreportingUp for xxx minutes
Login to the Portainer Server#
you can now login using your web browser at https://localhost:9443
if you receive a message of
Your Portainer instance timed out for security purposes, this occurs when you do not login within 5 minutes of performing the initial setup. You can execute the following (which will give you another 5 minutes to complete the initial setup):docker stop portainer docker start portainer
you should now see a page where you can create a user. Be sure to create a unique password and then click
Create user. You may wish to disable theAllow collection of anonymous statistics.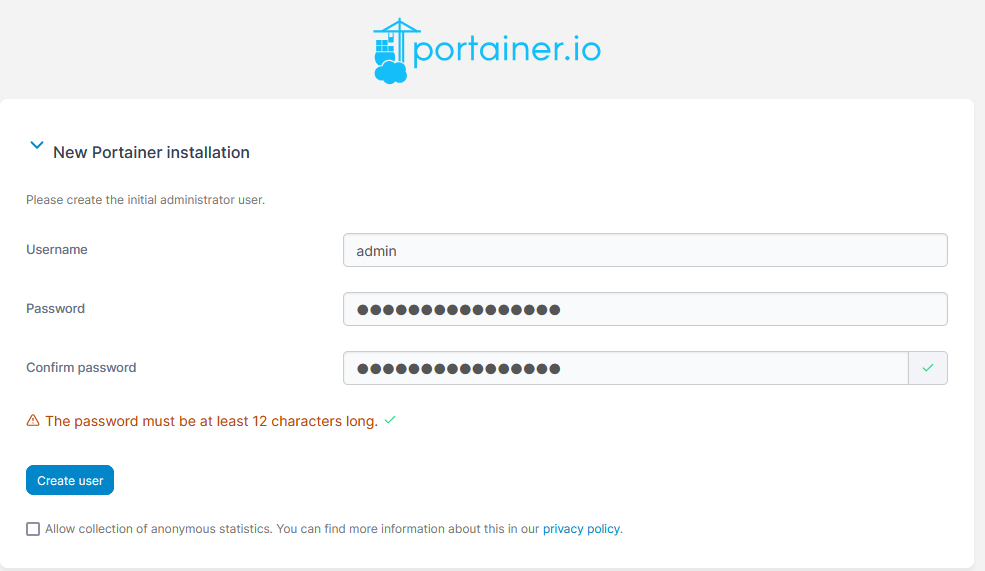
you should now see a
Welcome to Portainerpage, and then you can click theGet Startedbutton, to start using Portainer.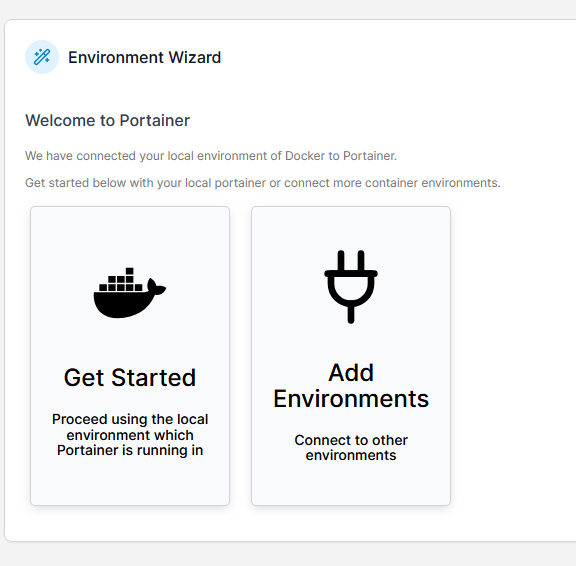
Manage your containers with Portainer#
in the left panel, click on
Containersto then see a list of your CKAN containers, and then interact with them if need be (stop/start/restart etc.).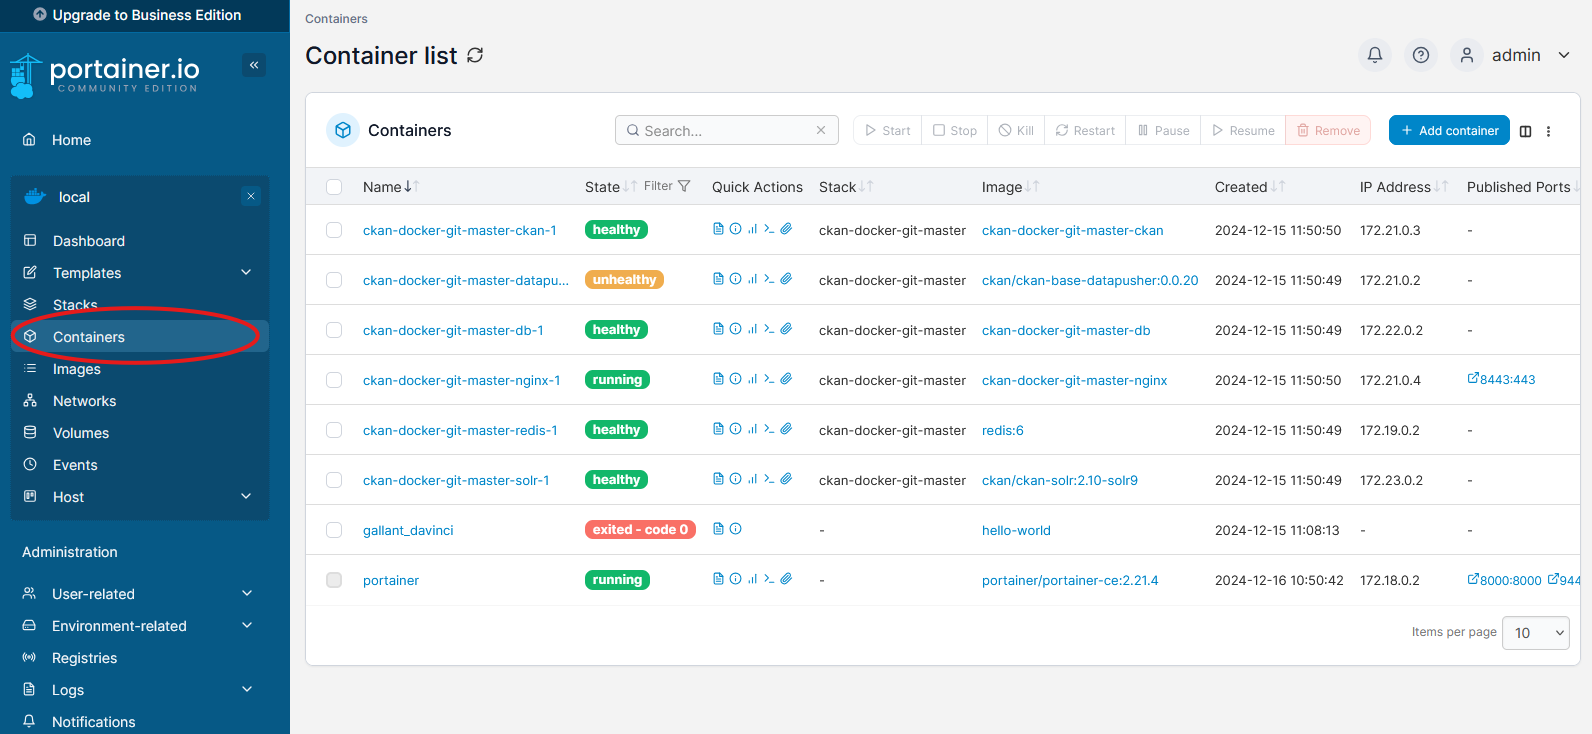
Install DCAT extension for JSON-LD Support#
We will follow the Docker compose README for CKAN, as well as the ckanext-dcat extension notes.
Edit the Dockerfile to install the ckanext-dcat extension#
assuming you are still at the
odis@prompt, but if not:goto Start menu, choose “WSL”
CMD window should open with an
odis@prompt
execute
cd ckan-docker-git-masternow use
vito add in the required section for the ckanext-dcat plugin into theDockerfile:#use vi to open the Dockerfile vi ckan/Dockerfile #to make your changes, first press your "i" key (for INSERT mode), and #then edit the desired lines #then save with the command :wq
around line#6, paste the following into the
Dockerfile:### prevent permissions errors when installing ckanext-dcat extension USER root ### DCAT ### RUN pip3 install -e 'git+https://github.com/ckan/ckanext-dcat.git@v2.1.0#egg=ckanext-dcat' && \ pip3 install -r https://raw.githubusercontent.com/ckan/ckanext-dcat/v2.1.0/requirements.txt
save the file
Edit the .env file to load the Extensions#
Inside the ckan-docker-git-master directory, use vi to edit the .env file
to add the dcat and structured_data plugins, as follows:
open the .env file:
vi .env
around line#69, change the
CKAN__PLUGINSline to add the 2 extensions, such as:CKAN__PLUGINS="image_view text_view datatables_view datastore datapusher envvars dcat structured_data"
save the file
Rebuild the containers#
build the Docker images
docker compose -f docker-compose.yml build
you should see a line mentioning the
RUN pip3 install -ecommand that we defined in the Dockerfile.
start the Docker containers
docker compose up -d
Check the status#
We can use the CKAN API to check if the new plugins were loaded successfully.
using the Firefox browser (which displays the JSON results nicely), goto: https://localhost:8443/api/action/status_show
you should see a list of extensions that include both
dcatandstructured_data, such as: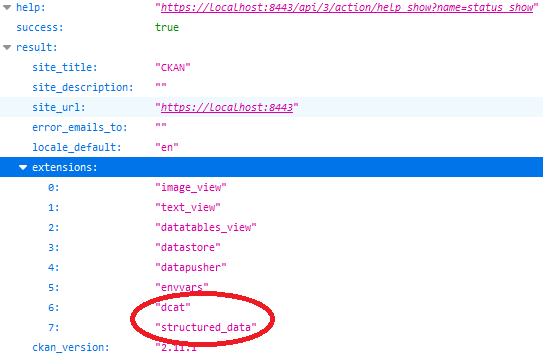
Connect to the CKAN container through commandline#
You will need to connect to the CKAN container through the commandline, which can be done through the following steps:
you will need to get the exact name of the CKAN container, which is easiest to see through Portainer.
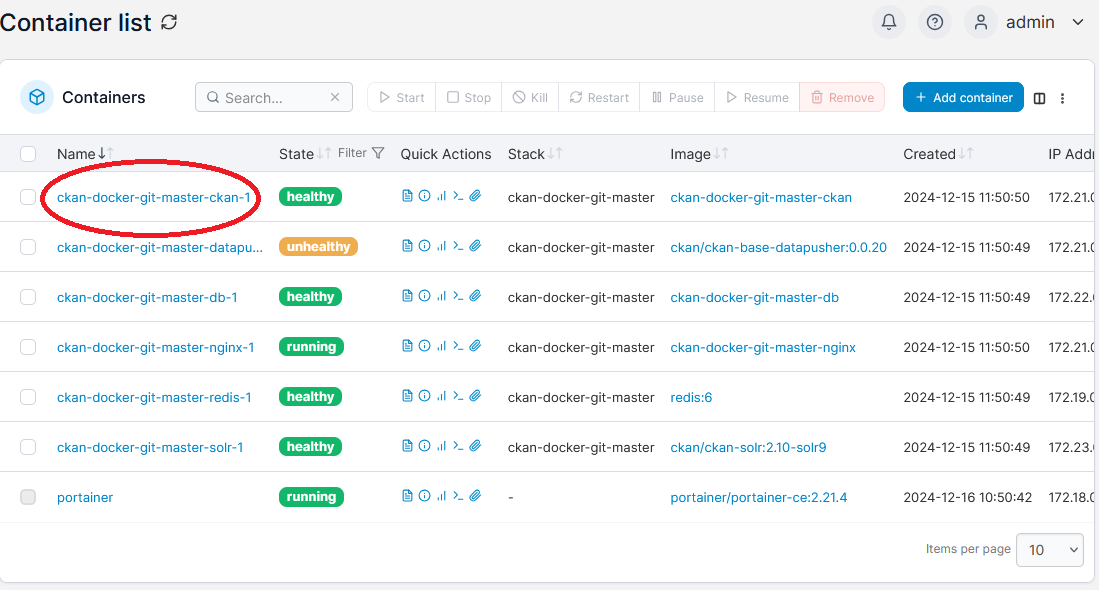
You can see above that the container name is
ckan-docker-git-master-ckan-1.assuming you are still at the
odis@prompt, but if not:goto Start menu, choose “WSL”
CMD window should open with an
odis@prompt
execute the following, to connect to the CKAN container (replace “ckan-docker-git-master-ckan-1” with your container name) :
docker exec -it ckan-docker-git-master-ckan-1 /bin/bash -c "export TERM=xterm; exec bash"
Your prompt should change to something like
ckan@af2e2e3ac57f. If you then executepwdyou can see that you are in the/srv/app/directory, on the CKAN container.
Install VI on the CKAN container#
If you get a command not found error when trying to open a file with vi
on the ckan container, you will have to first connect as root, and then install
vim, as follows:
execute the following, to connect to the CKAN container as root (replace “ckan-docker-git-master-ckan-1” with your container name) :
docker exec -u root -it ckan-docker-git-master-ckan-1 /bin/bash
now update your local packages:
apt-get update
finally install
vim:apt-get install vim
Then retry your vi command.
Modify the CKAN template#
Once connected to the CKAN container (see previous step), you can edit
the read_base.html Jinja2 template files, to add a JSON-LD block,
as follows:
now use
vito edit theread_base.htmlfile:vi src/ckan/ckan/templates/package/read_base.html
in the
{% block head_extras -%}section, around line#13, paste the following:{% block structured_data %} <script type="application/ld+json"> </script> {% endblock %}
save the file, and
exitthe containerback on your host machine, restart the CKAN container
docker restart ckan-docker-git-master-ckan-1
if you have added a Dataset, now if you right-click on the dataset’s main page (that url would be something like https://localhost:8443/dataset/point-test ) you should see a
<script type="application/ld+json">section inside the page source (which is the embedded JSON-LD, that is required by ODIS), similar to the following snippet:{ "@context": { "brick": "https://brickschema.org/schema/Brick#", "csvw": "http://www.w3.org/ns/csvw#", "dc": "http://purl.org/dc/elements/1.1/", "dcam": "http://purl.org/dc/dcam/", "dcat": "http://www.w3.org/ns/dcat#", "dcmitype": "http://purl.org/dc/dcmitype/", "dcterms": "http://purl.org/dc/terms/", "doap": "http://usefulinc.com/ns/doap#", "foaf": "http://xmlns.com/foaf/0.1/", "geo": "http://www.opengis.net/ont/geosparql#", "odrl": "http://www.w3.org/ns/odrl/2/", "org": "http://www.w3.org/ns/org#", "owl": "http://www.w3.org/2002/07/owl#", "prof": "http://www.w3.org/ns/dx/prof/", "prov": "http://www.w3.org/ns/prov#", "qb": "http://purl.org/linked-data/cube#", "rdf": "http://www.w3.org/1999/02/22-rdf-syntax-ns#", "rdfs": "http://www.w3.org/2000/01/rdf-schema#", "schema": "http://schema.org/", "sh": "http://www.w3.org/ns/shacl#", "skos": "http://www.w3.org/2004/02/skos/core#", "sosa": "http://www.w3.org/ns/sosa/", "ssn": "http://www.w3.org/ns/ssn/", "time": "http://www.w3.org/2006/time#", "vann": "http://purl.org/vocab/vann/", "void": "http://rdfs.org/ns/void#", "wgs": "https://www.w3.org/2003/01/geo/wgs84_pos#", "xsd": "http://www.w3.org/2001/XMLSchema#" }, "@graph": [ { "@id": "https://localhost:8443/dataset/2ac53087-e1b1-4301-9c85-6461f81cf595", "@type": "schema:Dataset", "schema:creator": { "@id": "https://localhost:8443/organization/e37afbc0-4270-4e26-ac15-036590485814" }, "schema:dateModified": "2025-01-17T19:20:38.929522", "schema:datePublished": "2025-01-17T19:20:10.193510", "schema:distribution": { "@id": "https://localhost:8443/dataset/2ac53087-e1b1-4301-9c85-6461f81cf595/resource/883a935f-02bf-4d96-9a40-02e8566ddbed" }, "schema:includedInDataCatalog": { "@id": "_:N327f3587332f414ca7f4844b454cffe9" }, "schema:license": "http://www.opendefinition.org/licenses/cc-by-sa", "schema:name": "Point test", "schema:publisher": { "@id": "https://localhost:8443/organization/e37afbc0-4270-4e26-ac15-036590485814" }, "schema:url": "https://localhost:8443/dataset/point-test" }, { "@id": "_:N327f3587332f414ca7f4844b454cffe9", "@type": "schema:DataCatalog", "schema:description": "", "schema:name": "CKAN", "schema:url": "https://localhost:8443" }, { "@id": "https://localhost:8443/organization/e37afbc0-4270-4e26-ac15-036590485814", "@type": "schema:Organization", "schema:contactPoint": [ { "@id": "_:N8f3eab00d6a7479d889d86e1cdba9894" }, { "@id": "_:N55713fa9e8ff489aa8ea185298b1344e" } ], "schema:name": "OIH" }, { "@id": "_:N8f3eab00d6a7479d889d86e1cdba9894", "@type": "schema:ContactPoint", "schema:contactType": "customer service", "schema:url": "https://localhost:8443" }, { "@id": "_:N55713fa9e8ff489aa8ea185298b1344e", "@type": "schema:ContactPoint", "schema:contactType": "customer service", "schema:url": "https://localhost:8443" }, { "@id": "https://localhost:8443/dataset/2ac53087-e1b1-4301-9c85-6461f81cf595/resource/883a935f-02bf-4d96-9a40-02e8566ddbed", "@type": "schema:DataDownload", "schema:contentSize": 57, "schema:encodingFormat": "JSON", "schema:name": "point.json", "schema:url": "https://localhost:8443/dataset/2ac53087-e1b1-4301-9c85-6461f81cf595/resource/883a935f-02bf-4d96-9a40-02e8566ddbed/download/point.json" } ] }
Generate a sitemap for your CKAN instance#
A sitemap is required to allow ODIS to locate and harvest your CKAN catalogue. We will implement the ckanext-sitemap extension, as follows.
Edit the Dockerfile to install the ckanext-sitemap extension#
assuming you are still at the
odis@prompt, but if not:goto Start menu, choose “WSL”
CMD window should open with an
odis@prompt
execute
cd ckan-docker-git-masternow use
vito add in the required section for the ckanext-dcat plugin into theDockerfile:#use vi to open the Dockerfile vi ckan/Dockerfile #to make your changes, first press your "i" key (for INSERT mode), and #then edit the desired lines #then save with the command :wq
around line#6 (after the DCAT section) paste the following into the
Dockerfile:### SITEMAP ### RUN pip3 install -e 'git+https://github.com/datopian/ckanext-sitemap.git@master#egg=ckanext-sitemap' && \ pip3 install -r https://raw.githubusercontent.com/datopian/ckanext-sitemap/refs/heads/master/requirements.txt
save the file
Edit the .env file to load the Extension#
Inside the ckan-docker-git-master directory, use vi to edit the .env file
to add the dcat and structured_data plugins, as follows:
open the .env file:
vi .env
around line#69, change the
CKAN__PLUGINSline to add thesitemapextension, such as:CKAN__PLUGINS="image_view text_view datatables_view datastore datapusher envvars dcat structured_data sitemap"
save the file
Rebuild the containers#
build the Docker images
docker compose -f docker-compose.yml build
start the Docker containers
docker compose up -d
Check the status#
We can use the CKAN API to check if the new plugin was loaded successfully.
using the Firefox browser (which displays the JSON results nicely), goto: https://localhost:8443/api/action/status_show
you should see a list of extensions that includes
sitemap, such as: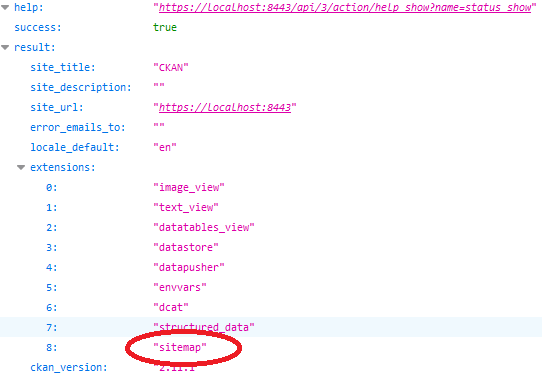
Connect to the CKAN container and Generate the sitemap#
The sitemap extension requires us to run a command on the CKAN container to generate the sitemap, so we must connect to the container, as follows:
Note
As there could be a permissions issue when generating (and writing) the sitemap
to the folder, we will connect as root.
execute the following, to connect to the CKAN container (replace “ckan-docker-git-master-ckan-1” with your container name) :
docker exec -u root -it ckan-docker-git-master-ckan-1 /bin/bash -c "export TERM=xterm; exec bash"
in that default
/srv/app/directory, we can run the command to generate the sitemap:ckan ckanext-sitemap generate

the sitemap will be created in the following folder:
/srv/app/src/ckanext-sitemap/ckanext/sitemap/public
we need to modify the permissions of the folder where the sitemap was generated (especially for when it will be auto-generated later), by executing the following commands:
chown -R ckan:ckan-sys /srv/app/src/ckanext-sitemap/ckanext/sitemap/public/
chmod -R 775 /srv/app/src/ckanext-sitemap/ckanext/sitemap/public/
View the sitemap#
The sitemap will be visible in your browser now, at the root of your instance, such as: https://localhost:8443/sitemap_index.xml
Tip
You can learn more about sitemaps in the Publishing section of the ODIS Book.
note that the extension has generated a sitemap index (usually a list of individual sitemaps), so you can copy the
<loc>url and open it in a new tab, to view the actual sitemap, such as https://localhost:8443/sitemap-0.xmlyou should now see a list of
<loc>values for your catalogue, including your test dataset record, such as: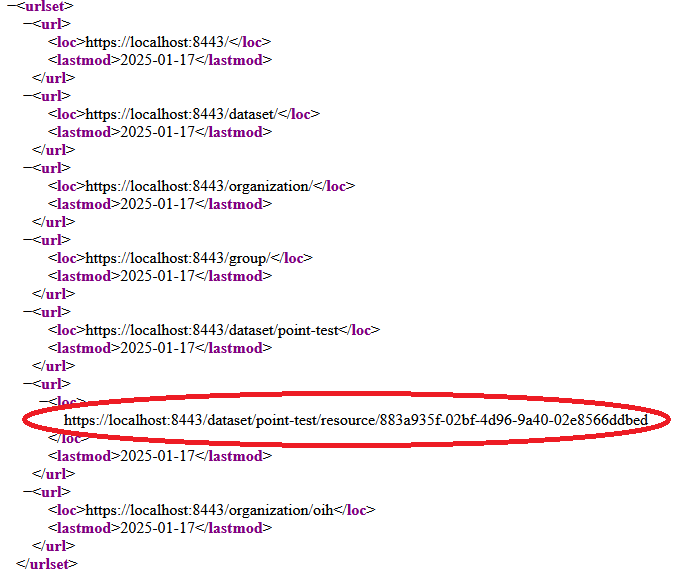
Configure the sitemap extension#
There are several environment variables that can be set in the ckan.ini file,
such as how often the sitemap is auto-generated. See the full list of possible
settings here.
At the minimum, you should likely set the variable autorenew to true,
as follows:
on the
CKANcontainer, edit theckan.inifilevi /srv/app/ckan.ini
insert the following at the bottom of the file:
ckanext.sitemap.autorenew = True
now
exitthe CKAN container, and restart it, such as:docker restart ckan-docker-git-master-ckan-1
now your sitemap will be regenerated, if the sitemap link is visited and the sitemap is older than 8 hours.
Create an entry in the ODIS Catalogue and point to sitemap#
ODIS will use your entry in the ODIS Catalogue (“ODISCat”) to find and harvest your sitemap. Be sure to go through the quick steps in the Getting Started with ODIS section of the ODIS Book, to make sure that your ODISCat entry is created properly.
Docker Troubleshooting#
Check Logs#
you can check logs through the commandline, passing the name of the container, such as:
docker logs ckan-docker-git-master-ckan-1
alternatively you can use Portainer to check the logs of a container, just click on the little file icon beside the container name, such as:

Restart container#
you can restart a container through the commandline, passing the name of the container, such as:
docker restart ckan-docker-git-master-ckan-1
alternatively you can use Portainer to restart container, just select the container on the left, and then click the
Restartbutton above, such as:
Remove all containers#
Sometimes you might want to start over, so you can execute the following to delete all Docker containers and cache.
Caution
This will remove all existing containers, even those that are running.
remove all containers:
sudo docker rm -f $(sudo docker ps -a -q)
remove cache:
docker system prune -a
Option 2: Install CKAN & dependencies manually#
Install PostgreSQL#
PostgreSQL is a popular Open Source database, that will store tables leveraged by CKAN. It also has a very strong spatial engine, PostGIS. We will now install both PostgreSQL and PostGIS, as follows:
near the top, click on “Download the installer certified by EDB”
click the latest for “Windows x86-64”
double-click the installer file
leave default install directory as-is (C:/Program Files/PostgreSQL/17/)
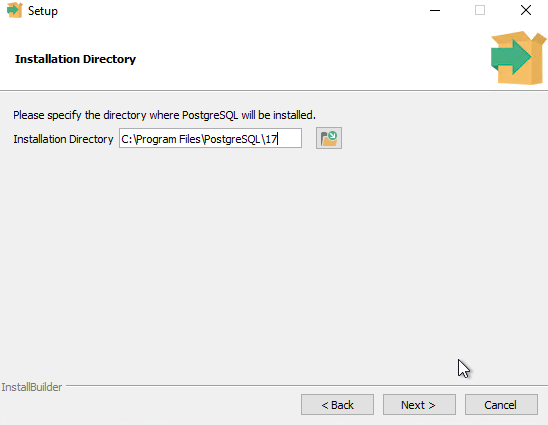
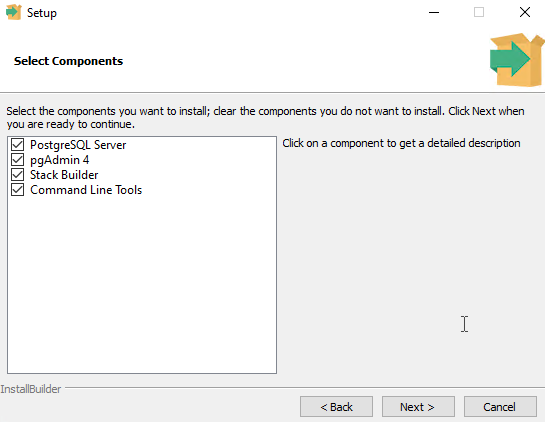
leave default components as-is
leave data directory as-is (C:/Program Files/PostgreSQL/17/data/)
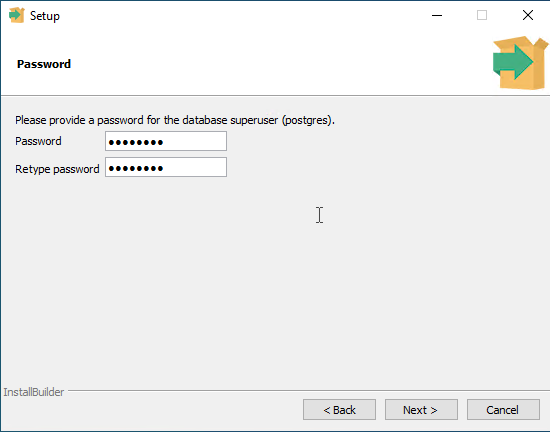
for superuser password, use “postgres”
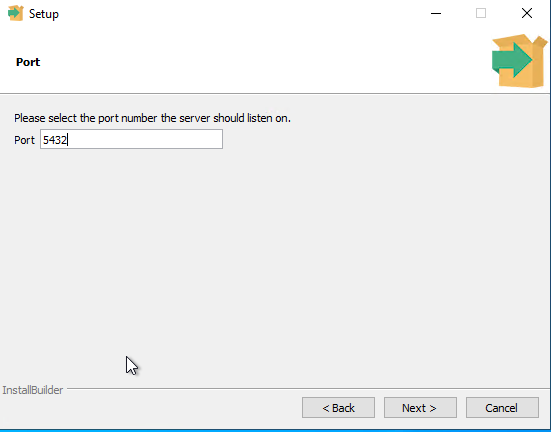
leave port as-s (5432)
leave locale as-is
install
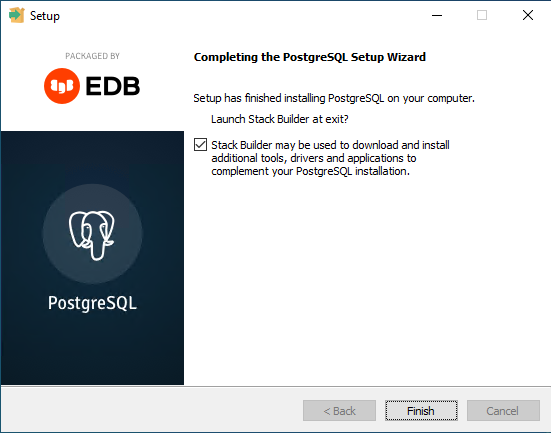
make sure “Stack Builder” is selected and then click “Finish”
in the “Stack Builder” window, select your installation in the dropdown (“PostgreSQL 17 on port 5432”) and then click “Next”
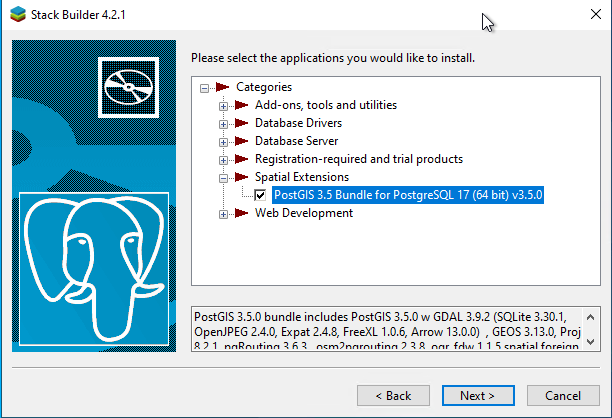
expand “Spatial Extensions” and click the checkbox for “PostGIS x.x Bundle for PostgreSQL”
leave download directory as-is, click “Next”
wait for the PostGIS installer to download
click “Next” to begin PostGIS install
click “I Agree” to the PostGIS license
leave components as-is
leave destination folder as-is
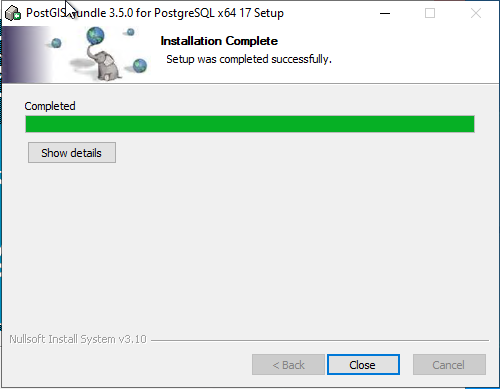
click “Finish” to end the installation
Install Python#
CKAN 2.11 (the latest release as of writing this document) supports Python versions 3.9 to 3.12. This document will explain how to install Python 3.12, as follows:
Note
If you have an existing Python installation, you may attempt at using it, but leveraging a Python virtual environment (venv) is recommended, which is explained later in this document.
create a new folder “Python” at the root of your C:/ drive, so you have a path of
C:/Pythondownload 3.12.7 “Windows installer (64-bit)” from https://www.python.org/downloads/windows/
double-click the file “python-3.12.7-amd64.exe” to install
choose “Customize installation” & check the checkbox for “add python.exe to PATH”
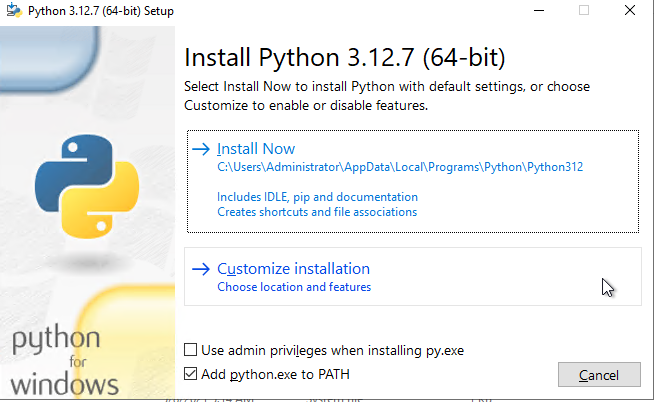
leave “Optional Features” as-is
for “Advanced Options”, click on the “Browse” button, to select the install location, and choose the
C:/Pythonfolder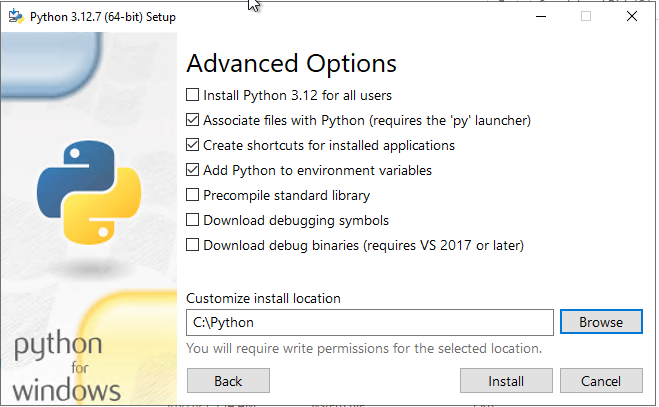
click the “Install” button
test with a CMD command
in the Windows search bar, type “CMD” and press
on your keyboard make sure you right-click on the icon and select “Run as Administrator”

at the command prompt, type:
python --version
Install Git#
We will use git to “checkout” (which means to get locally) the latest changes in software that is required for CKAN (as often the released code contains errors, that are fixed in the software’s GitHub repository). We will also be using git through the commandline.
Tip
After installing, will use the commandline for git, but you will also see a “Git GUI” option in the Start Menu, that you may prefer for a more visual experience. There are also other visual tools that you can install instead, such as GitHub Desktop.
goto https://git-scm.com/downloads/win and select “Click here to download” the 64-bit version of Git for Windows
run the installer
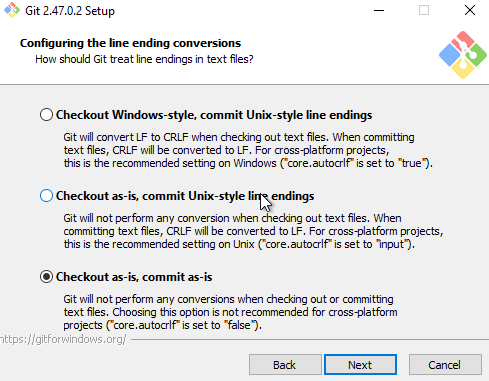
select “Checkout as-is, commit as-is”
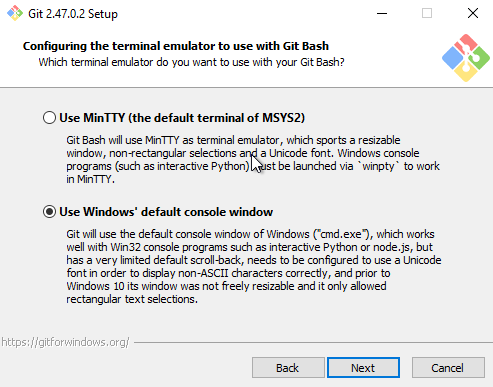
select “Use Windows’ default console window”
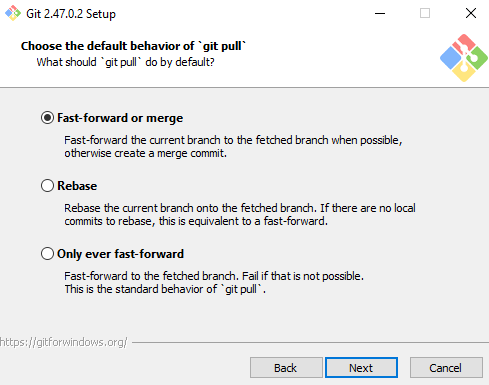
select “Fast-forward or merge” for ‘git pull’
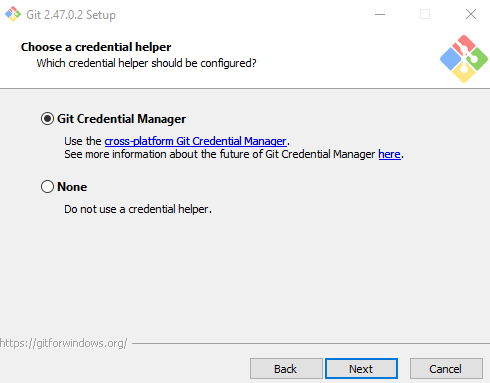
default credential manager (no changes)
select “Enable file system caching”
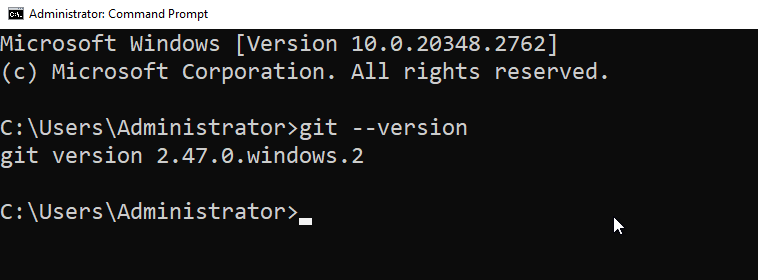
test by opening a CMD window and executing: git –version
Create a working directory#
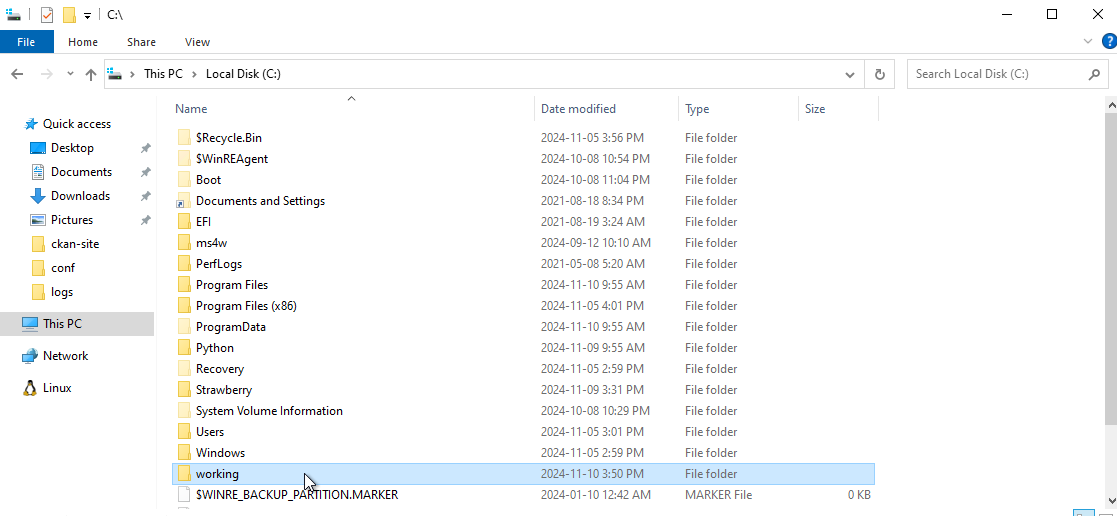
Using Windows File Explorer, create a new folder named “working” at the
C:/ drive root, so you have the existing path C:/working
Create virtual environment in Python#
We will use a venv virtual environment in Python, to make sure that
the installation does not conflict with others on your server. Open
a CMD window, and execute the following to create a new ckan-venv environment:
cd C:\working
python -m venv ckan-venv
C:\working\ckan-venv\Scripts\activate
You should now see a prompt that looks like the following:

You can also execute deactivate to exit that ckan-venv virtual environment,
and then execute C:\working\ckan-venv\Scripts\activate to reactivate.
Upgrade pip#
Open a CMD window, and make sure that your ckan-venv is activated, and then
upgrade pip as follows:
python -m pip install --upgrade pip
Checkout the CKAN source code and build CKAN#
We will use git to get the latest source code direct from the CKAN
repository on GitHub, and then build CKAN inside the ckan-venv virtual
environment. Open a CMD window, and execute:
cd C:\working
C:\working\ckan-venv\Scripts\activate
git clone https://github.com/ckan/ckan.git ckan-git-master
cd ckan-git-master
python -m pip install --upgrade -r requirements.txt
python -m pip install python-magic-bin
python -m pip install -e .
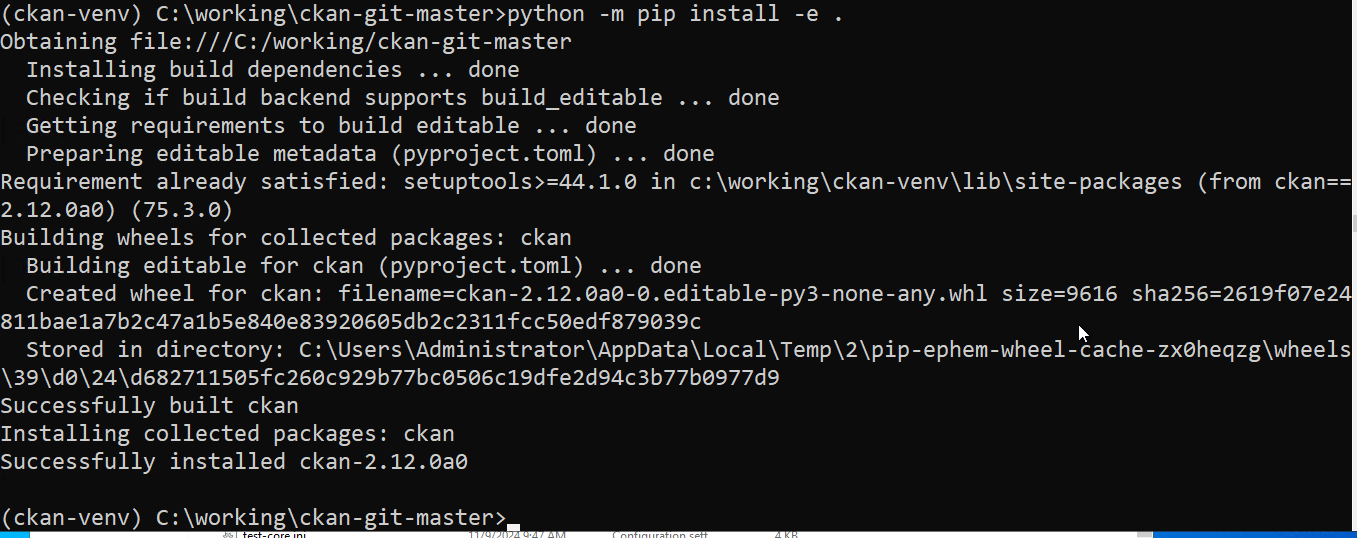
You can now try to a test, to see the usage, such as:

Add PostgreSQL utils to PATH#
We will need to run various PostgreSQL tools from the commandline, so we need
to make sure that they are found on the PATH environment variable on your
server. To set the system PATH, execute the following:
in the Windows search bar, searcg for “env” and choose “Edit the system environment variables”
click on the bottom “Environment variables” button
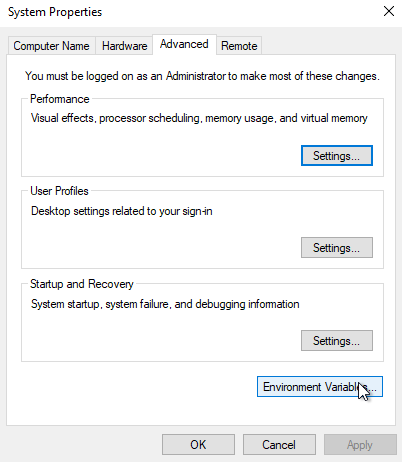
select
Pathin the lower “System variables” section and click the “Edit…” button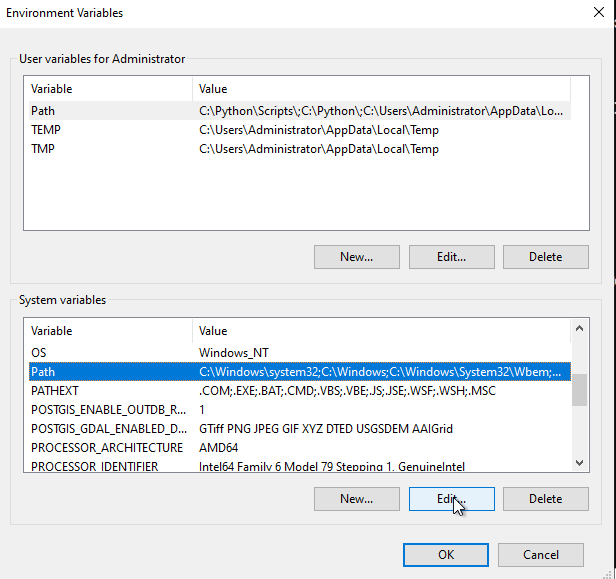
click “New” and then “Browse” to C:/Program Files/PostgreSQL/xx/bin/”
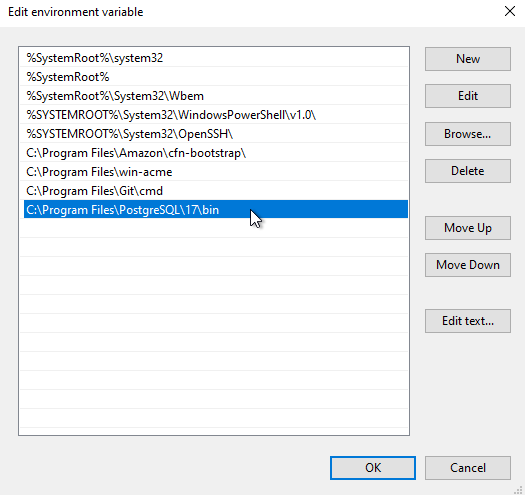
click “OK”
close your CMD window, and re-open it
test by executing:
psql --version
Create the ckan database#
We will now create a user profile in ckanuser PostgreSQL. Open a CMD window
and execute:
createuser -U postgres -p 5432 -s -D -r -P ckanuser
then enter the following responses:
enter password for new role: odis
enter it again: odis
password: postgres
We will now create a new database ckandb in PostgreSQL. In your CMD window
execute:
createdb -U postgres -p 5432 -O ckanuser ckandb -E utf-8
For the password enter postgres
Install the PostGIS extension in ckandb#
You likely will need spatial tables inside the ckandb database, so it
is recommended to enable the PostGIS extension, by executing in your
CMD window as follows:
psql -U ckanuser -p 5432 -d ckandb
For the password enter odis
You should now be at a prompt like ckandb=>
Then execute to list all tables: \d <enter>
You should see a response as Did not find any relations
Next execute:
CREATE EXTENSION postgis;  <enter>
CREATE EXTENSION postgis_topology;  <enter>
ALTER DATABASE ckandb SET client_min_messages TO WARNING;  <enter>
Again execute to list all tables (you should see more tables now) : \d <enter>
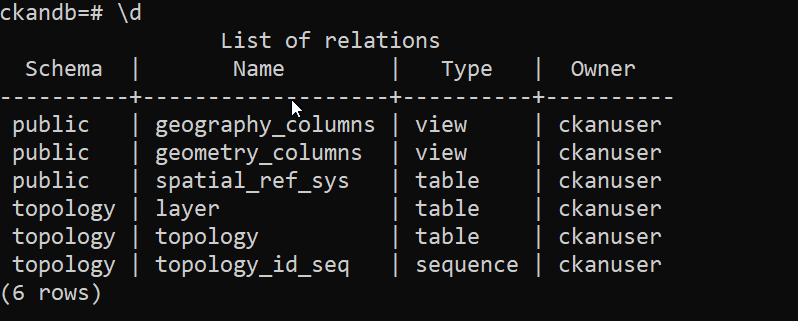
to quit, execute: \q <enter>
Generate config file for CKAN#
We will run the built ckan tool to generate a config file for CKAN. Open a
CMD window and execute:
cd C:\working
C:\working\ckan-venv\Scripts\activate
mkdir ckan-site
cd ckan-site
ckan generate config ckan.ini
Now open in Notepad++: C:\working\ckan-site\ckan.ini
and set the following:
  line# 73:
    sqlalchemy.url = postgresql://ckanuser:odis@localhost/ckandb

  line# 78:
    ckan.site_url = http://localhost:5000

  line# 139:
    ckan.site_id = default

  line# 195
    extra_template_paths = C:\working\ckan-git-master\ckan\templates

  line# 202:
    ckan.storage_path = C:\working\ckan-site\data
Using Windows File Explorer, then create a new data folder inside
C:\working\ckan-site
Install Java JRE#
Several tools for CKAN require that we install Java, as follows:
download “Open JDK 21.x” from https://learn.microsoft.com/en-ca/java/openjdk/download
Tip
JDK 21 is recommended for latest Solr through GitHub
use MSI installer for x64 platform
run installer (use all defaults)
test: open a new CMD window and execute:
java --version
check your system Environment Variables list to make sure JAVA_HOME is set
set it to:
C:\Program Files\Microsoft\jdk-17.0.13.11-hotspot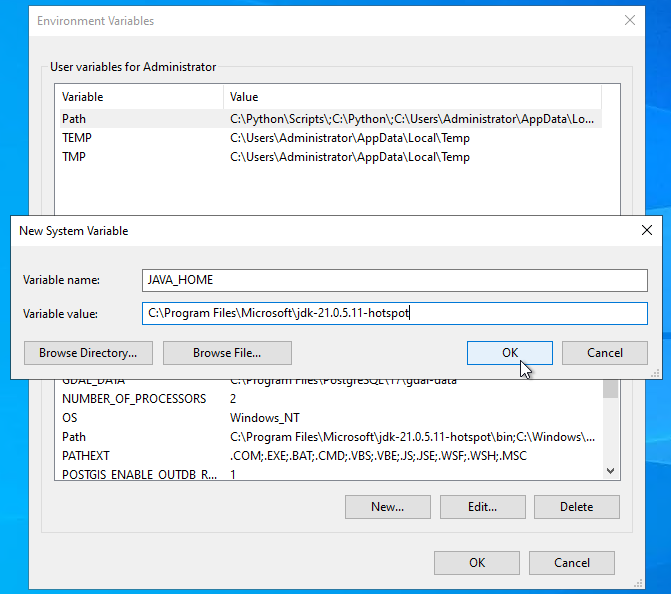
Install Strawberry Perl#
download: https://strawberryperl.com/
use MSI installer
leave defaults as-is
test in new CMD window, executing:
perl --version
Install Solr#
CKAN leverages Solr for its fast indexing/searches. To install Solr execute the following in a CMD window:
cd C:\working
C:\working\ckan-venv\Scripts\activate
git clone https://github.com/apache/solr.git solr-git-main
cd solr-git-main
gradlew dev
cd C:\working\solr-git-main\solr\packaging\build\dev

Test Solr by executing:
bin\solr.cmd --helpNow we must start Solr in “standalone mode”
bin\solr.cmd start --user-managed -p 8983

In your web browser goto: http://localhost:8983/solr
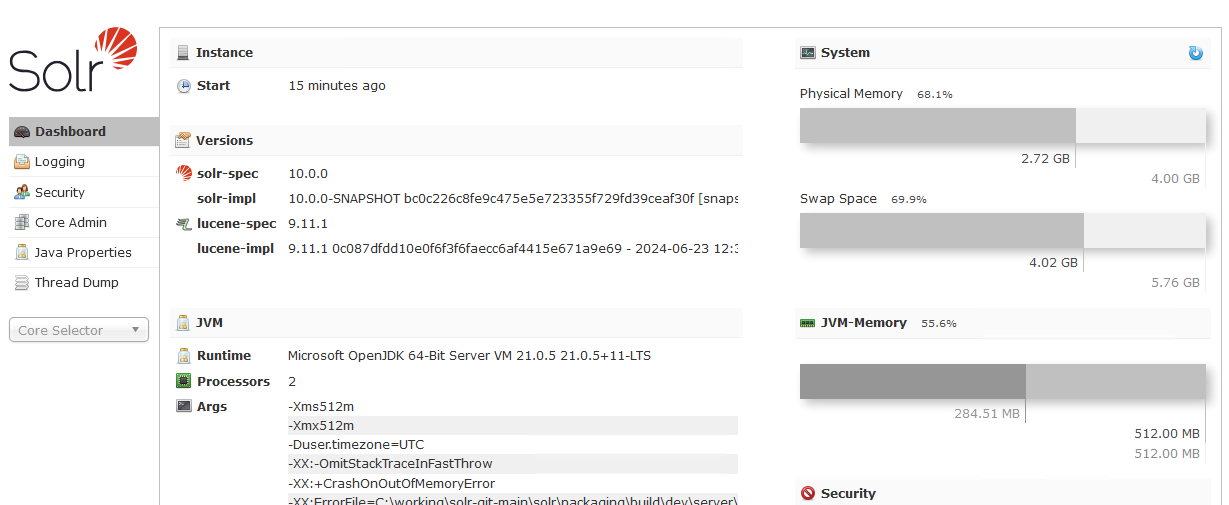
Now check Solr status with
bin\solr.cmd status
        Solr process 2360 running on port 8983
        {
          "solr_home":"C:\\working\\solr-git-main\\solr\\packaging\\build\\dev\\server\\solr",
          "version":"10.0.0-SNAPSHOT bc0c226c8fe9c475e5e723355f729fd39ceaf30f [snapshot build, details omitted]",
          "startTime":"Sat Nov 09 16:01:17 AST 2024",
          "uptime":"0 days, 0 hours, 13 minutes, 19 seconds",
          "memory":"115.4 MB (%22.5) of 512 MB"}
now create a new
ckanSolr core
bin\solr.cmd create -c ckan
which should return: Created new core 'ckan'
now stop Solr
bin\solr.cmd stop -p 8983
copy schema.xml from
C:\working\ckan-git-master\ckan\config\solrtoC:\working\solr-git-main\solr\packaging\build\dev\server\solr\ckan\confdelete the file
managed-schema.xmlinC:\working\solr-git-main\solr\packaging\build\dev\server\solr\ckan\confnow start Solr
bin\solr.cmd start --user-managed -p 8983
in your web browser, check the
ckancore
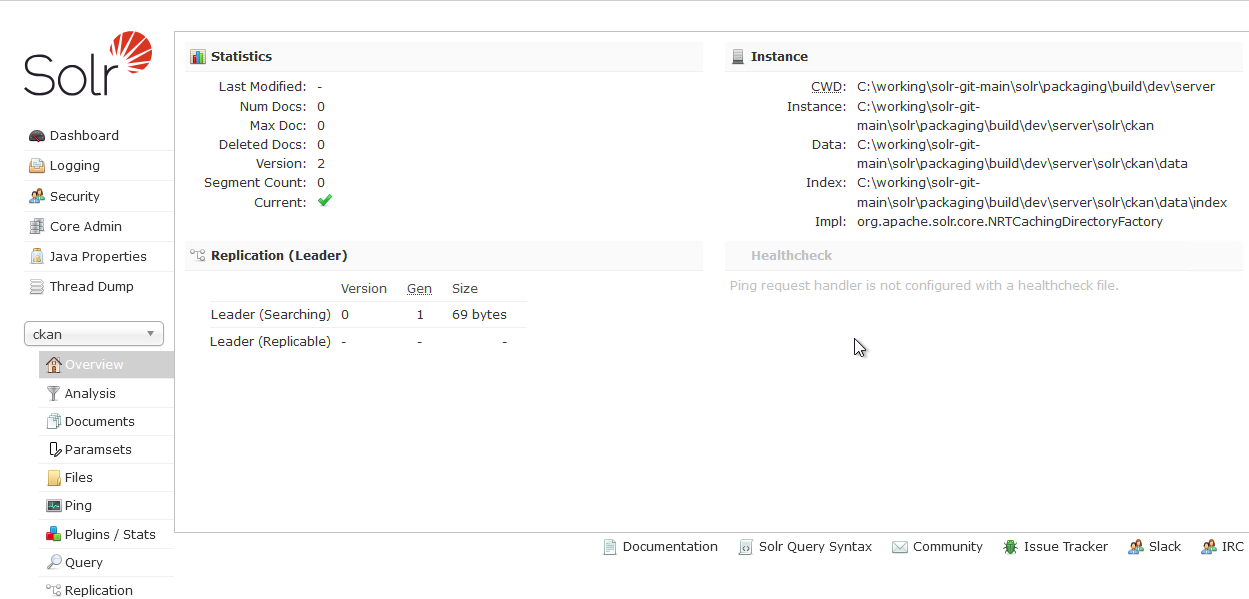
you can also check the status of the core at the commandline, by executing:
curl -X GET http://localhost:8983/api/cores/ckan
which should give a response such as:
      {
        "responseHeader":{
          "status":0,
          "QTime":4
        },
        "initFailures":{ },
        "status":{
          "ckan":{
            "name":"ckan",
            "instanceDir":"C:\\working\\solr-git-main\\solr\\packaging\\build\\dev\\server\\solr\\ckan",
            "dataDir":"C:\\working\\solr-git-main\\solr\\packaging\\build\\dev\\server\\solr\\ckan\\data\\",
            "config":"solrconfig.xml",
            "schema":"managed-schema.xml",
            "startTime":"2024-11-09T20:33:09.309Z",
            "uptime":253492,
            "index":{
              "numDocs":0,
              "maxDoc":0,
              "deletedDocs":0,
              "version":2,
              "segmentCount":0,
              "current":true,
              "hasDeletions":false,
              "directory":"org.apache.lucene.store.NRTCachingDirectory:NRTCachingDirectory(MMapDirectory@C:\\working\\solr-git-main\\solr\\packaging\\build\\dev\\server\\solr\\ckan\\data\\index lockFactory=org.apache.lucene.store.NativeFSLockFactory@17a1916f; maxCacheMB=48.0 maxMergeSizeMB=4.0)",
              "segmentsFile":"segments_1",
              "segmentsFileSizeInBytes":69,
              "userData":{ },
              "sizeInBytes":69,
              "size":"69 bytes"
            }
          }
        }
      }
Install Redis#
To install Redis (required for CKAN), we must install the WSL (Windows Subsystem for Linux), as follows:
follow https://learn.microsoft.com/en-us/windows/wsl/install
open CMD window and execute:
see list of all Linux distribution names
wsl --list --online
now install Ubuntu
wsl --install --enable-wsl2 --distribution "Ubuntu-24.04 LTS"

reboot machine
you should see a progress bar for installing Ubuntu
when asked to create a new user, enter:
username: odis
password: yourpassword
Caution
The WSL user has a lot of power (they have sudo/super-user permissions); it is strongly recommended that users change
yourpasswordto a secure and unique password for this account and keep hold of it in a password manager. That way if someone manages to hack CKAN and gain remote code execution capabilities, it won’t be so easy for them to gain super-user control.to run: goto Start menu, choose “WSL”
CMD window should open with an
odis@prompt
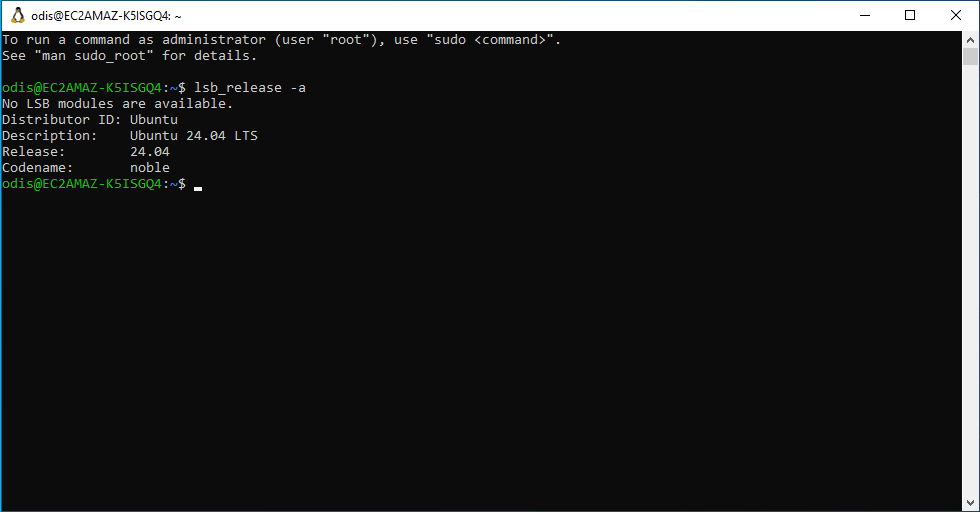
to check the Ubuntu version, execute:
lsb_release -a
which should return:
    Distributor ID: Ubuntu
    Description:    Ubuntu 24.04 LTS
    Release:        24.04
    Codename:       noble
install the redis package
(follow steps at https://redis.io/docs/latest/operate/oss_and_stack/install/install-redis/install-redis-on-windows/
curl -fsSL https://packages.redis.io/gpg | sudo gpg --dearmor -o /usr/share/keyrings/redis-archive-keyring.gpg
echo "deb [signed-by=/usr/share/keyrings/redis-archive-keyring.gpg] https://packages.redis.io/deb $(lsb_release -cs) main" | sudo tee /etc/apt/sources.list.d/redis.list
sudo apt-get update
sudo apt-get upgrade
sudo apt-get install redis
if error “Failed to take /etc/passwd lock: Invalid argument”, execute:
sudo mv /var/lib/dpkg/info /var/lib/dpkg/info_silent
sudo mkdir /var/lib/dpkg/info
sudo apt-get update
sudo apt-get -f install
sudo mv /var/lib/dpkg/info/* /var/lib/dpkg/info_silent
sudo rm -rf /var/lib/dpkg/info
sudo mv /var/lib/dpkg/info_silent /var/lib/dpkg/info
sudo apt-get update
sudo apt-get upgrade
sudo apt-get install redis
start the redis server
sudo service redis-server start
test it by running:
redis-cli
which should bring you to a prompt of
127.0.0.1:6379>, so then typeping <enter>the response should be
PONGif successful127.0.0.1:6379> 127.0.0.1:6379>ping PONG

Create the CKAN database tables#
open new CMD window, and execute:
C:\working\ckan-venv\Scripts\activate
cd C:\working\ckan-site
ckan -c ckan.ini db init
you should see a green message: “Upgrading DB: SUCCESS”

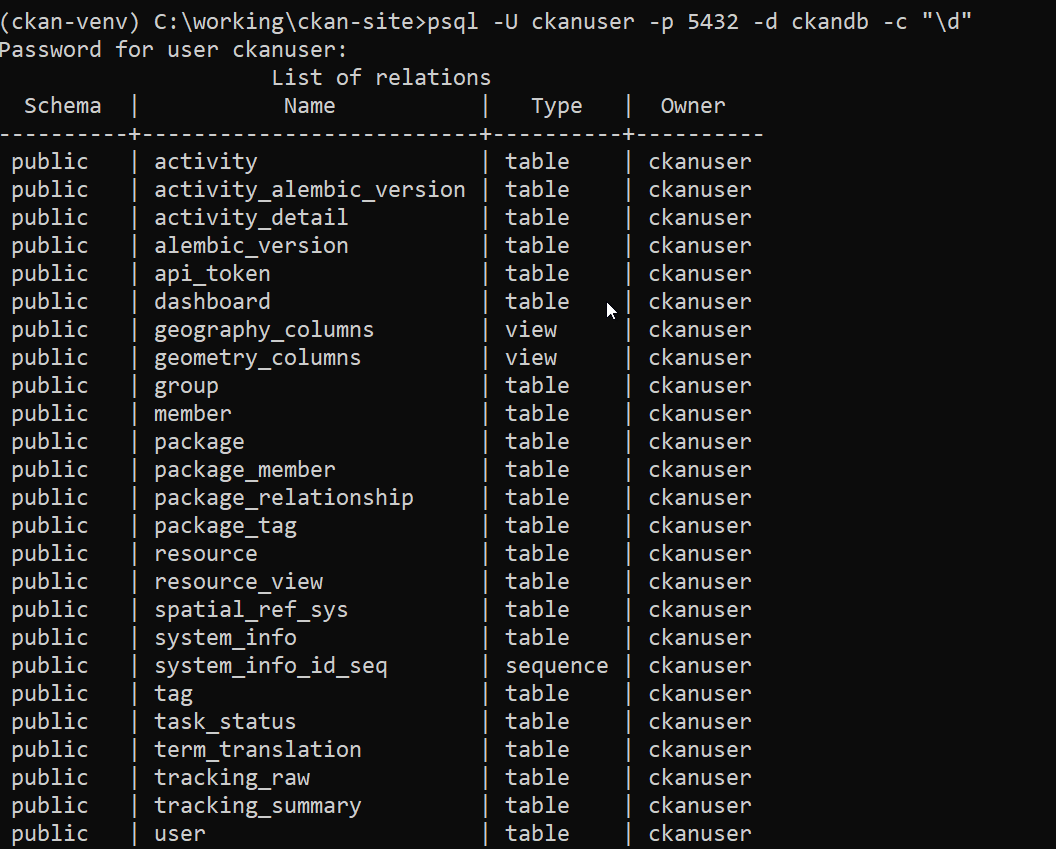
test with psql command:
psql -U ckanuser -p 5432 -d ckandb -c "\d"
for password enter
odisyou should see 32 rows of tables
Add CKAN user#
We will create an initial user admin for CKAN, with full
sysadmin powers, to manage the catalogue. Open a CMD window and
execute:
cd C:/working/ckan-site
C:\working\ckan-venv\Scripts\activate
ckan -c ckan.ini user add admin email=info@gatewaygeomatics.com
for password enter odisckan

then promote the “admin” user to sysadmin
ckan -c C:/working/ckan-site/ckan.ini sysadmin add admin
you should see a message of “Added admin as sysadmin”
Run CKAN#
We can use the internal “development server” to serve CKAN, as follows:
C:\working\ckan-venv\Scripts\activate
ckan -c C:/working/ckan-site/ckan.ini run
should see:
  2024-11-10 12:11:15,815 INFO  [ckan.cli.server] Running CKAN on http://localhost:5000
  2024-11-10 12:11:18,107 INFO  [ckan.cli] Using configuration file C:\working\ckan-site\ckan.ini
in your browser, goto: http://localhost:5000/
